Lab 1 - Setting Up Your Environment
In this lab, you will focus on setting up your environment which includes two virtual machines (VMs) that you will use throughout the rest of the semester. Be sure to follow the instructions carefully, and use the internet to clarify or look up information you do not know. Please don't hesitate to ask me questions as well! Each stage represents one part of the lab. Please be sure to show me that you're completion of each stage in order to get checked off for that part of the lab.
Expected Outcomes
- Ubuntu server and OPNSense are installed and running
- Ubuntu is layered behind OPNSense from the "external" network
- SSH is configured on your Ubuntu machine and accessible from outside OPNSense
Stage 1 - Accessing Proxmox
You will be hosting your virtual machines (VMs) on the School of Computing servers using a virtualization management software called Proxmox. Logging into Proxmox requires a CS account, which you should have verified access to back in Lab 1. If you do not yet have a CS account, please let me know.
Proxmox is accessible at the following URL: https://10.10.129.101:8006
In order to access the above URL, you must either use one of the computers in the lab, or have your personal device be connected to the School of Computing VPN.

Once you visit the Proxmox URL, you should be presented with the above screen. Your username will be your Southern.edu username without the @southern.edu portion at the end, and the password will be the password you set when first logging into the CS account. Please make sure that the realm is set to cs, and not one of the other options.
Once you login, press ok if you're presenting with a "no valid subscription" message, or alternatively refresh the page if clicking ok does not appear to get rid of the message.
Stage 2 - Creating your OPNSense VM
In this stage, you'll create the OPNSense VM. This machine will act as the "router" for your future private network you'll be setting up later on in the lab. To do so, follow these steps:
1. Click Create VM on the top right of the page in Proxmox
2. Next, you should see the following box appear:
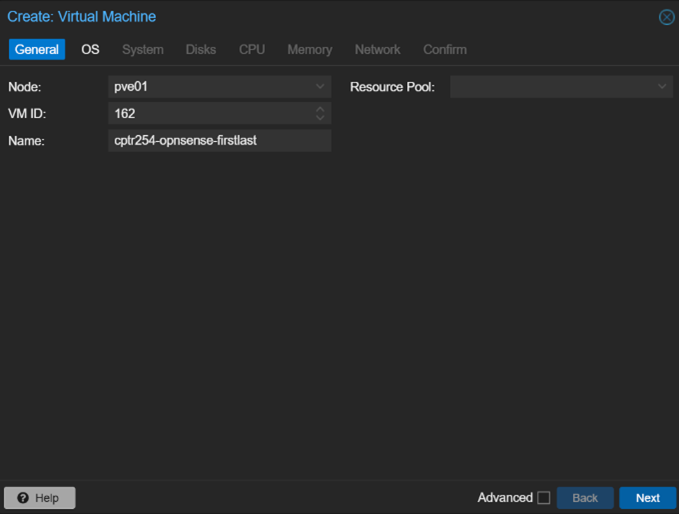
- Set the Name field to cptr254-opnsense-cs_account_username
- For example, if your logged into Proxmox with the username bobbyb, the server name would be cptr254-opnsense-bobbyb
- Set the Resource Pool to the pool matching your Southern username. Let me know if you do not appear to have one.
- Leave the rest of the fields as they are, and click next
3. Next, on the next page, you should be presented with the following options:
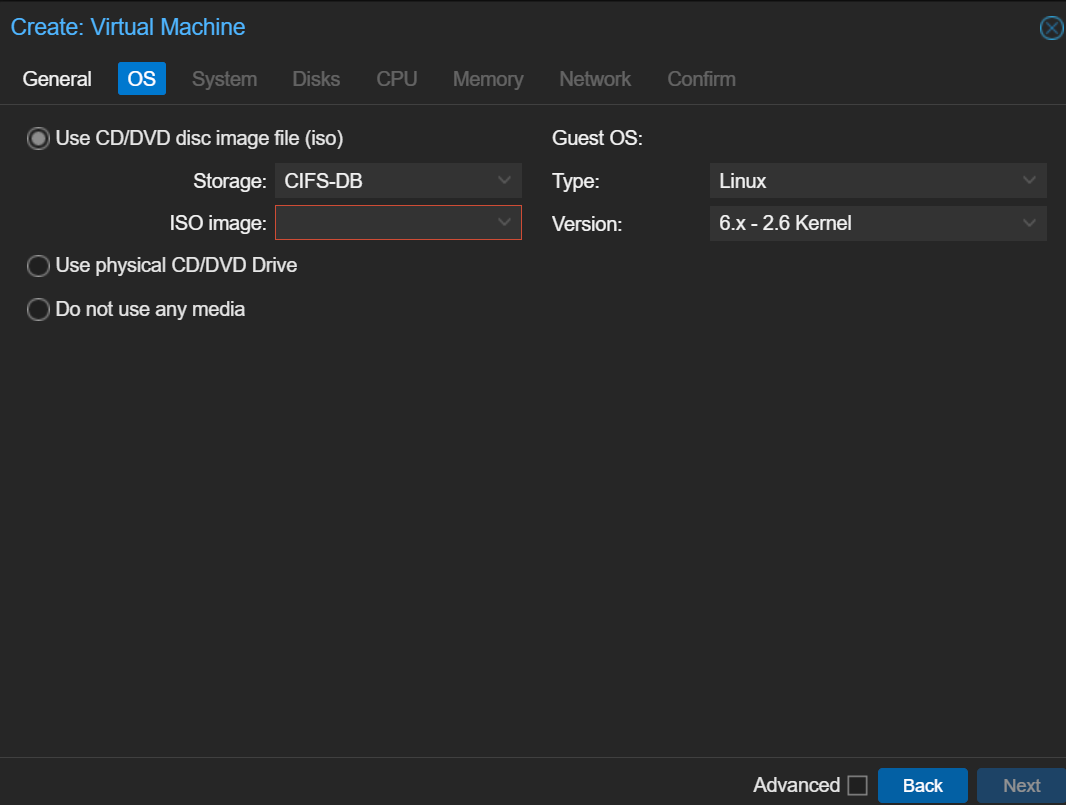
- Set the Storage field to CIFS-DB
- Set ISO Image to OPNsense-23.7-dvd-amd64.iso
- Leave the rest of the settings as is
4. Leave all settings on the System tab at default
5. On the Disks tab, set Storage to SSD and leave the rest as is
6. Under the CPU tab, set Cores to 2
7. Leave all settings on the Memory tab at default
8. On the Network tab, please refer to the VLAN assignments, and do the following:
- Set the Bridge to vmbr1
- Set the VLAN Tag to 14
- Leave the rest as is
9. Click next, verify all the settings match the specifications provided here, and click finish
-
In the event that you get an error referencing that your VM ID is already in use, navigate back to the General tab, and increment the VM ID field up until the box no longer has a red outline around it.
-
Next, navigate back to the Confirm tab and click finish
-
Your OPNsense VM should now successfully be provisioned
-
If it is not successfully created, let me know
Stage 2 - Creating your Ubuntu VM
In this section, you will go through the same steps as Stage 1, except specified for a Ubuntu VM.
1. Click Create VM once again
2. On the General tab, do the following:
-
Set the Name field to cptr254-ubuntu-cs_account_username
-
Set the Resource Pool field to the one with your CS account username
-
Leave the rest as is and click next
3. On the Storage tab, do the following:
-
Set the Storage field to CIFS-DB
-
Set ISO Image to ubuntu-24.04-live-server-amd64.iso
-
Leave the rest of the settings as is
4. Leave everything on the System tab default
5. On the Disks tab, set the Storage field to SSD
6. On the CPU tab, set the number of Cores to 2
7. On the Memory tab, set the Memory (MiB) field to 3072
8. On the Network tab, set the VLAN Tag field to the VLAN assigned to you here.
9. Click confirm. Your Ubuntu VM should now be created and ready to run
Stage 3 - Installing OPNSense
In this section, you will boot your OPNsense machine and complete the necessary configuration for this lab.
1. First, locate your newly created OPNsense VM, right click on it and click start
3. Next, login as the installer user
-
It will prompt you for a password. OPNsense has a default password that is initially set, where might you go to find it?
WARNING: Failing to run the installer user will mean you skip the installation process, and will result in OPNsense being reset upon every boot. Please ensure you run the installer user.
4. Once you successfully login as installer, you should be presented with the following display:

- Go ahead and press the Enter key to accept defaults
If you do not see the above display upon running the installer user, let me know
5. Next, you will be presented with several options, the top of which is Install (UFS). Simply accept the default setting by pressing Enter
6. On the next screen, you will be prompted to "select a disk to continue"
-
You should be presented with two options: cd0 and da0. Read the descriptions and decide which of the two options would be better suited to act as the target installation disk. Use the up/down arrow keys to change your selection, and press Enter to confirm.
7. On the next page, select Yes when prompted to "Continue with a recommended swap partition of size 8GB
8. At this last stage, you will be prompted with a message warning you that you are about to destroy the contents of a disk. Select Yes and continue
9. Wait for the installer to finish. You will be prompted with the option to either change your root password or complete install. If you choose to change your root password, try not to forget it. Otherwise you will have to restart your OPNsense installation. Finally, click Complete Install
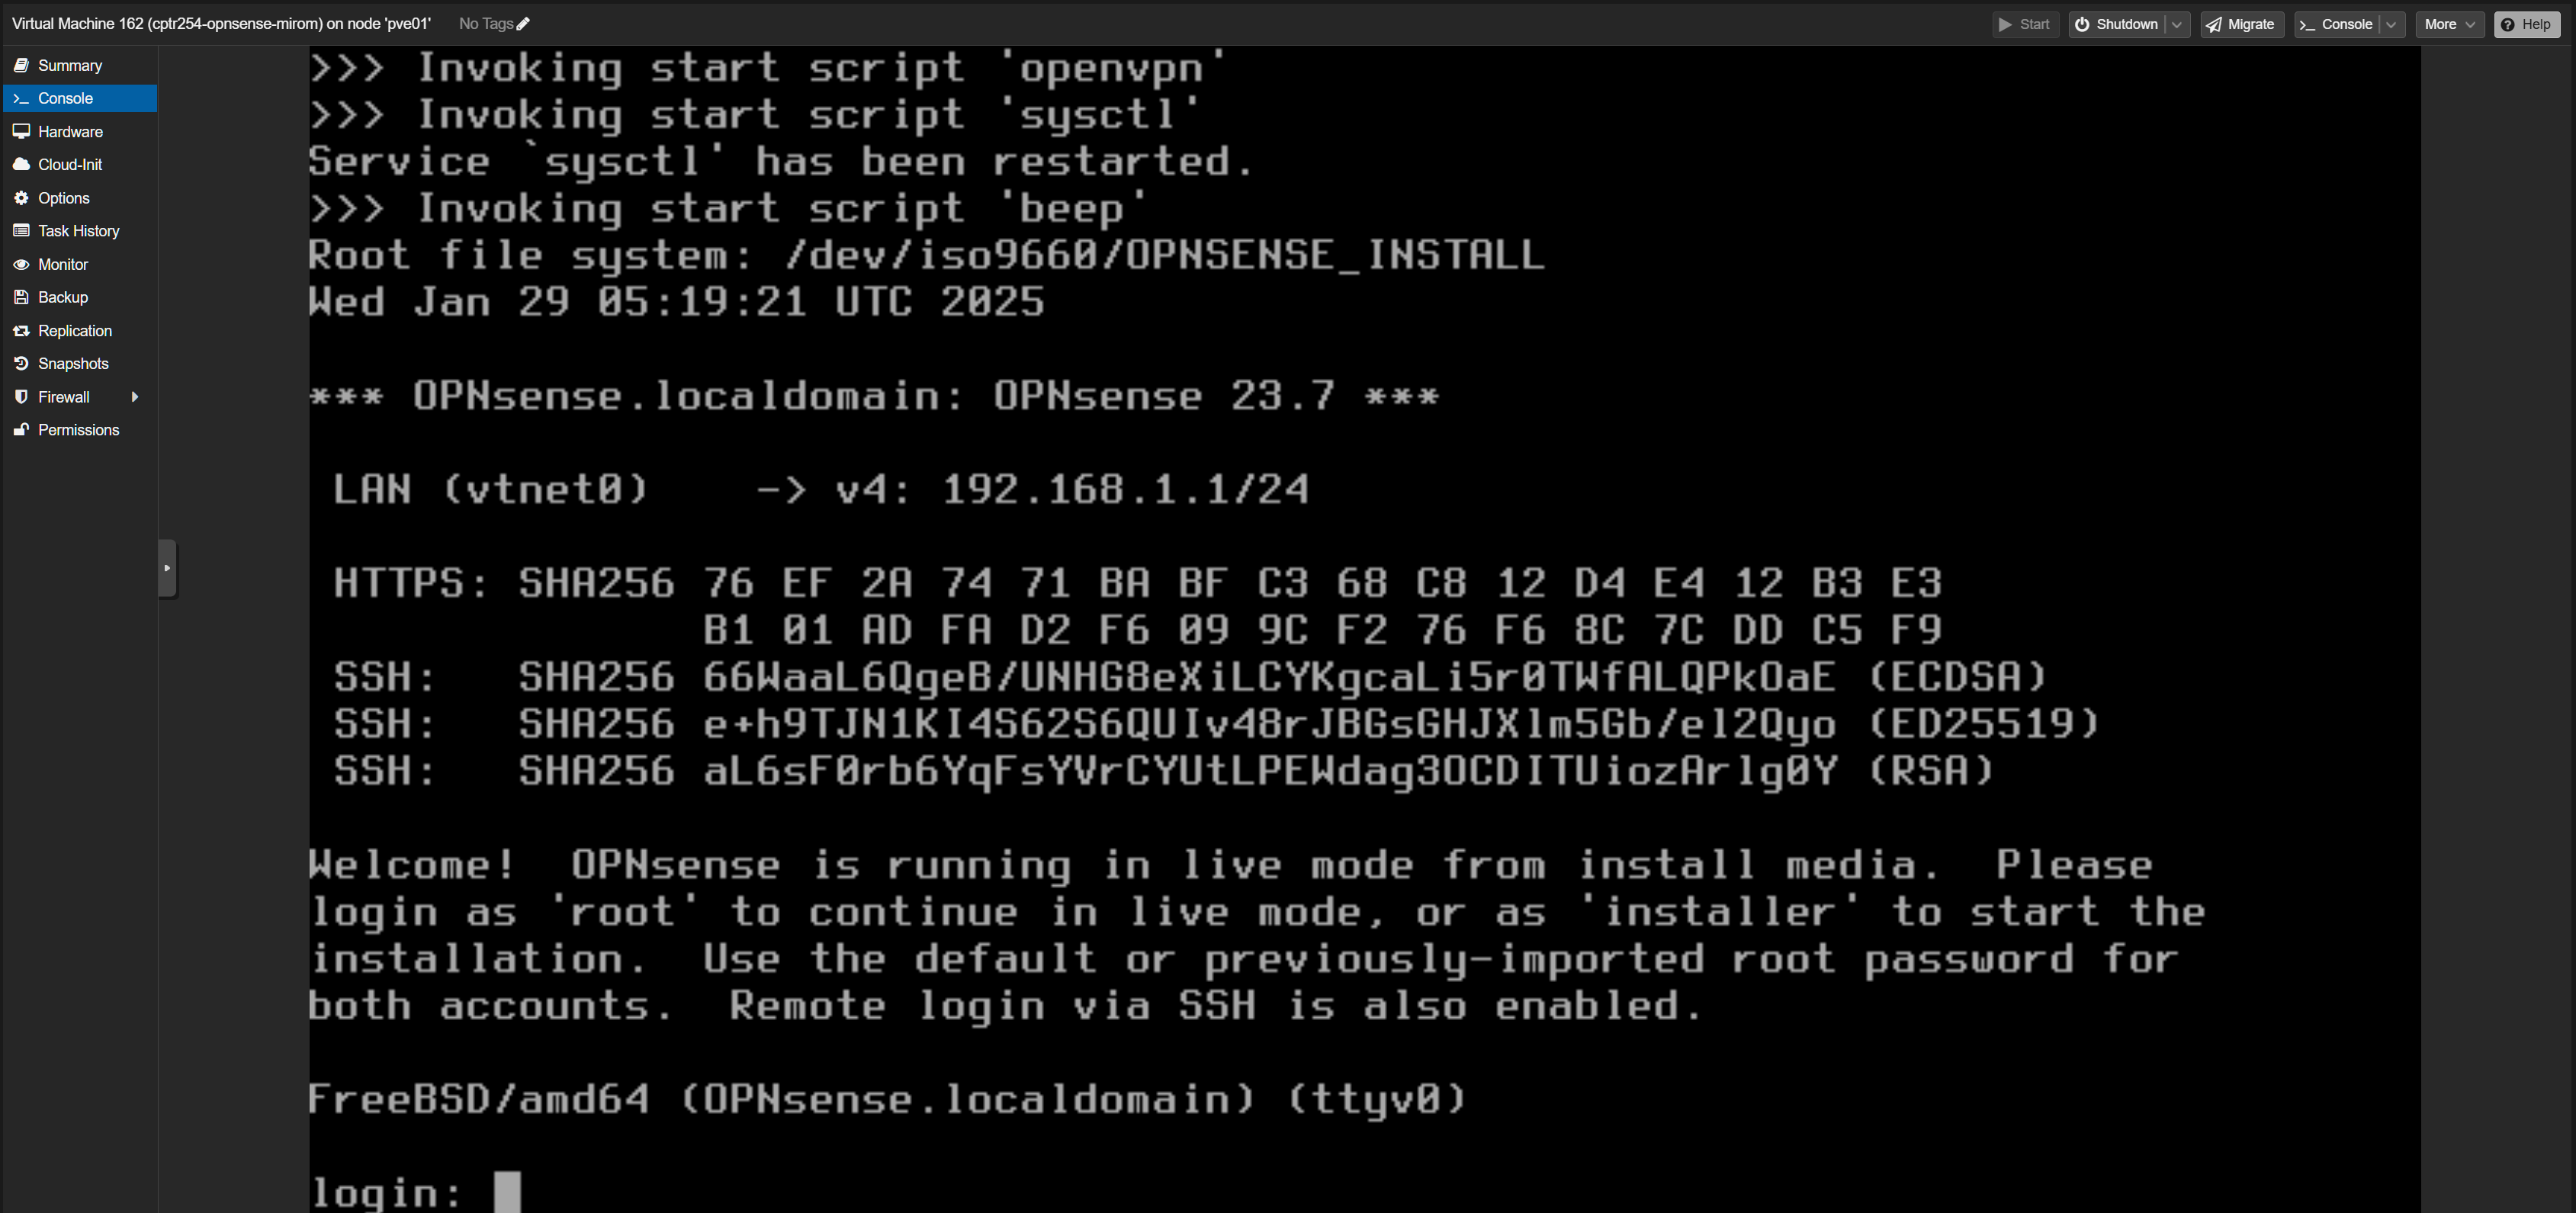
10. After clicking Complete Install, your OPNsense server should reboot on it's own, and you should once again be prompted with the login screen from Step 2
This new login display should look nearly identical to the screenshot from Step 2, except for one critical difference. If it still says "Welcome! OPNsense is currently running from live installation media", let me know. This message means OPNsense is currently running off of read-only installation media, and any changes you make will disappear upon reboot in this mode.
Stage 4 - Initial OPNsense Configuration
1. Login to your OPNsense as the root user, with either the root password you set, or the default, depending on wait you did in Stage 3.9
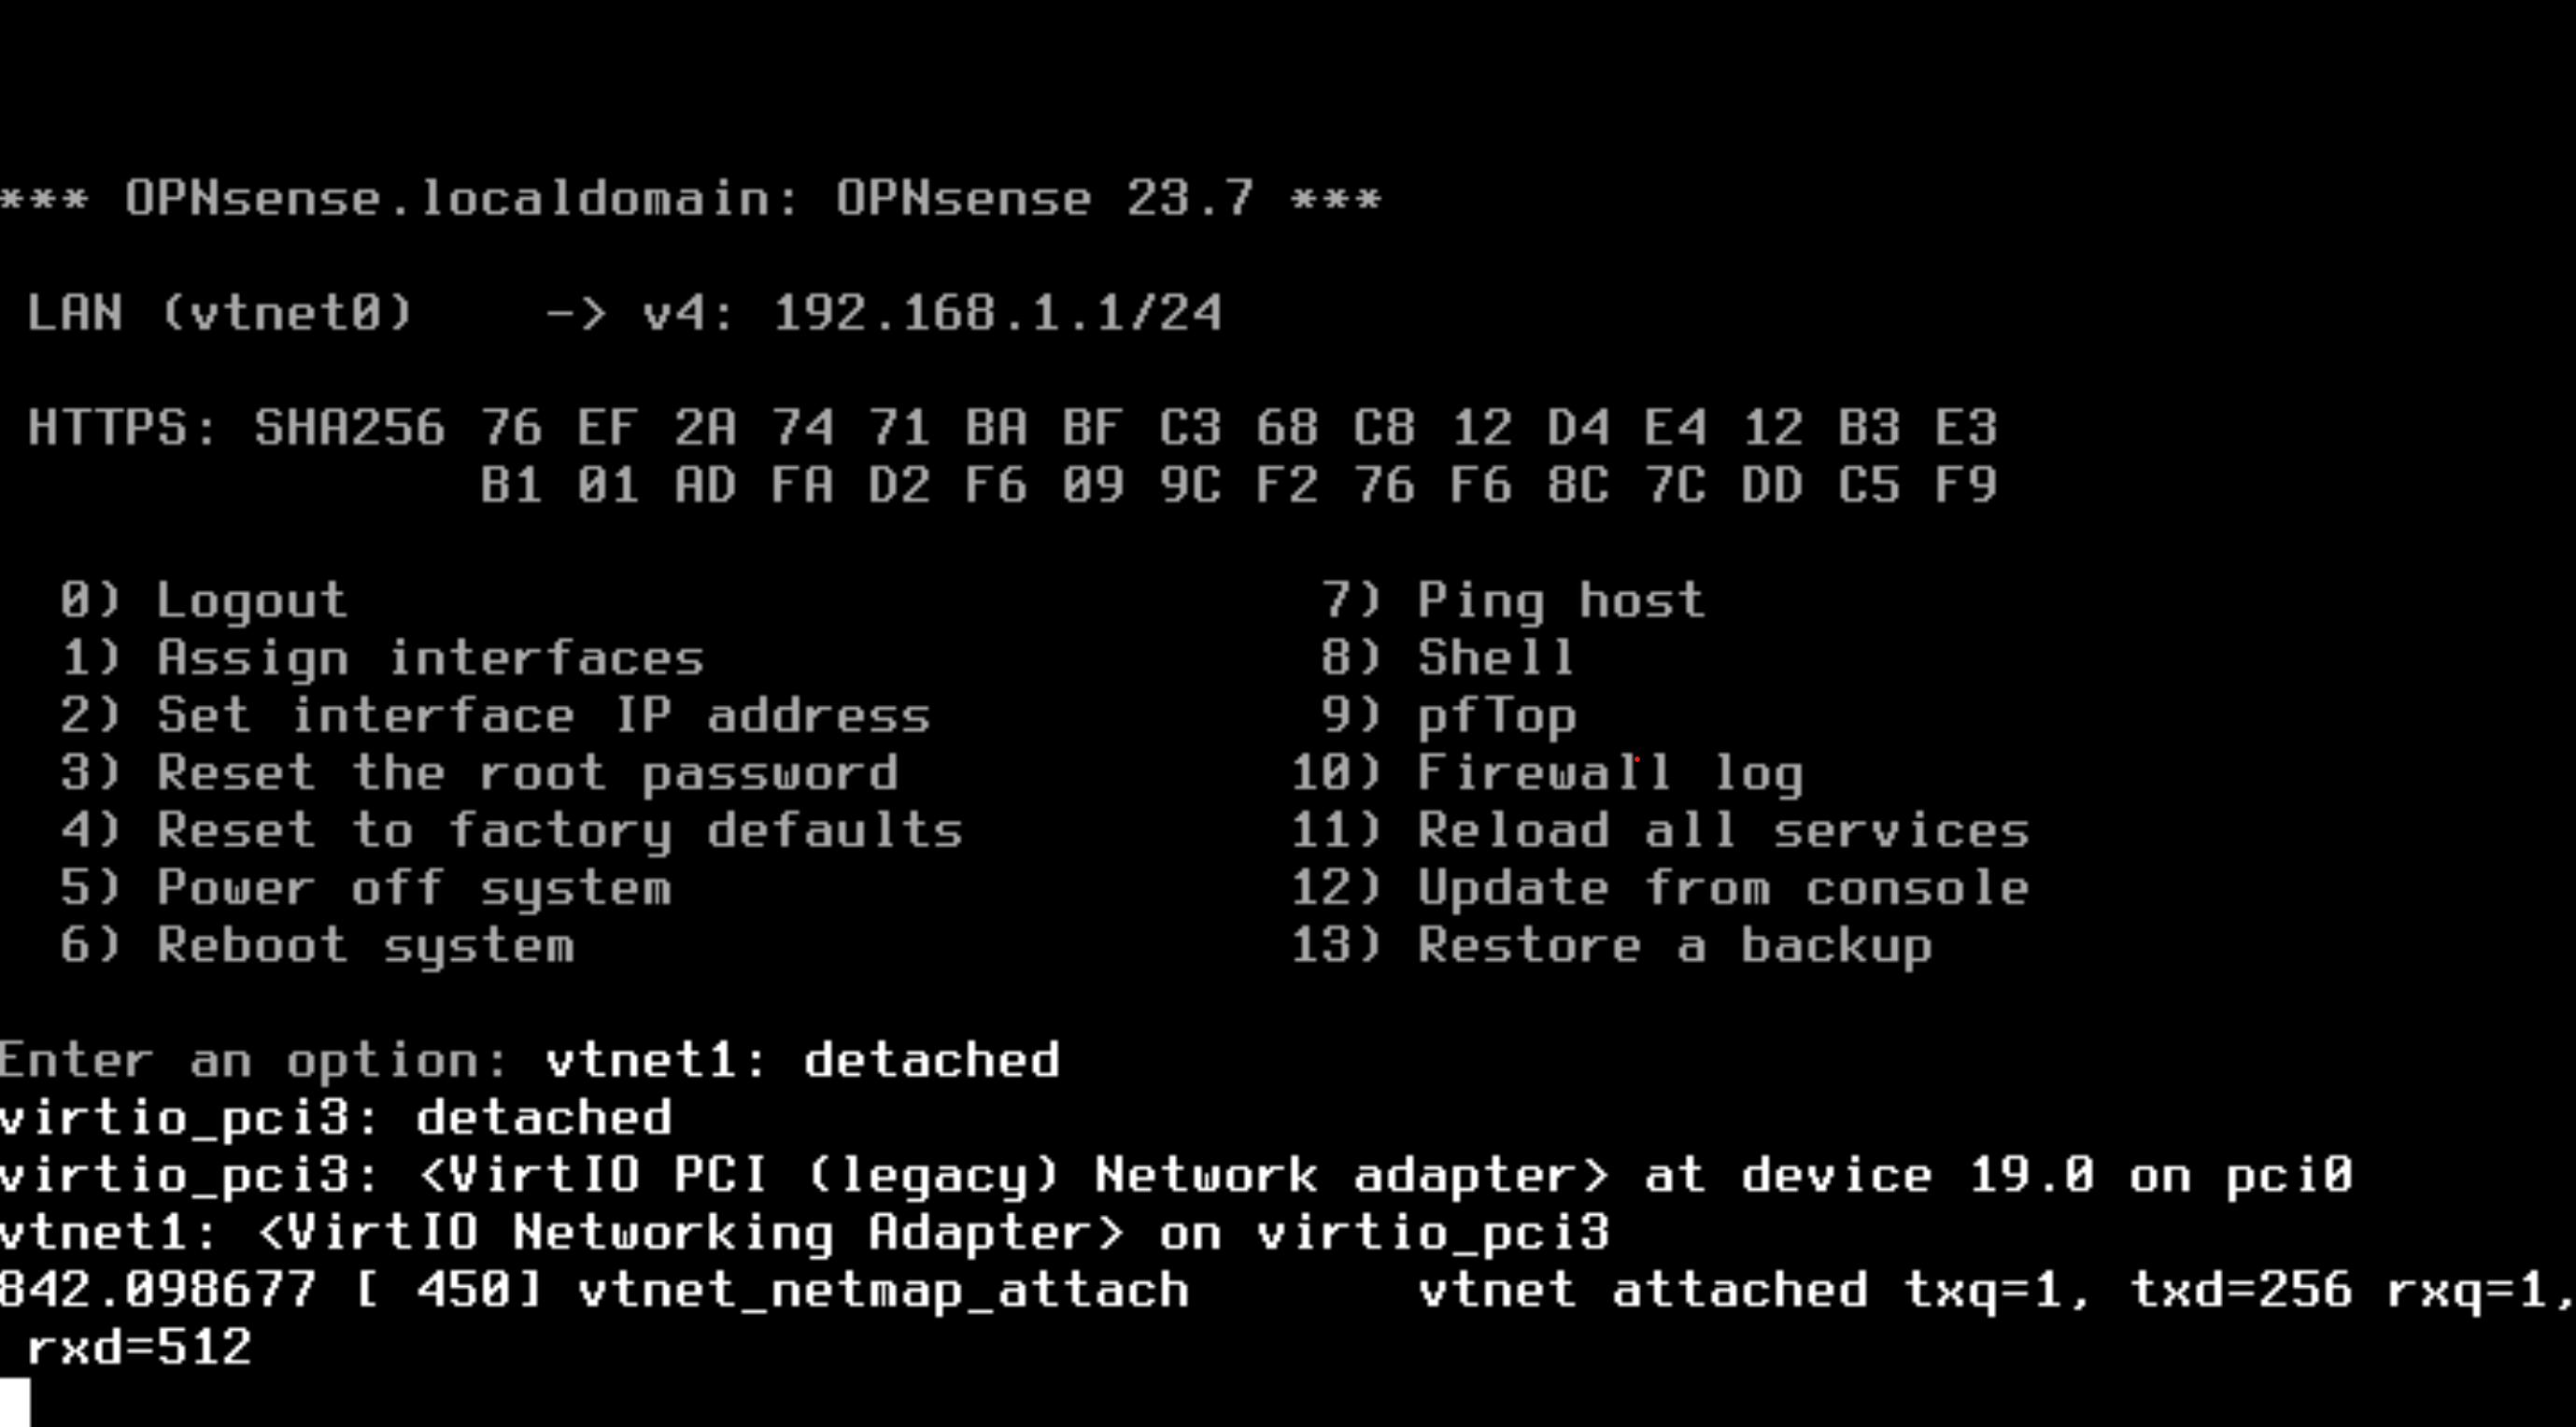
2. Upon successfully logging in, you should be presented with the following:
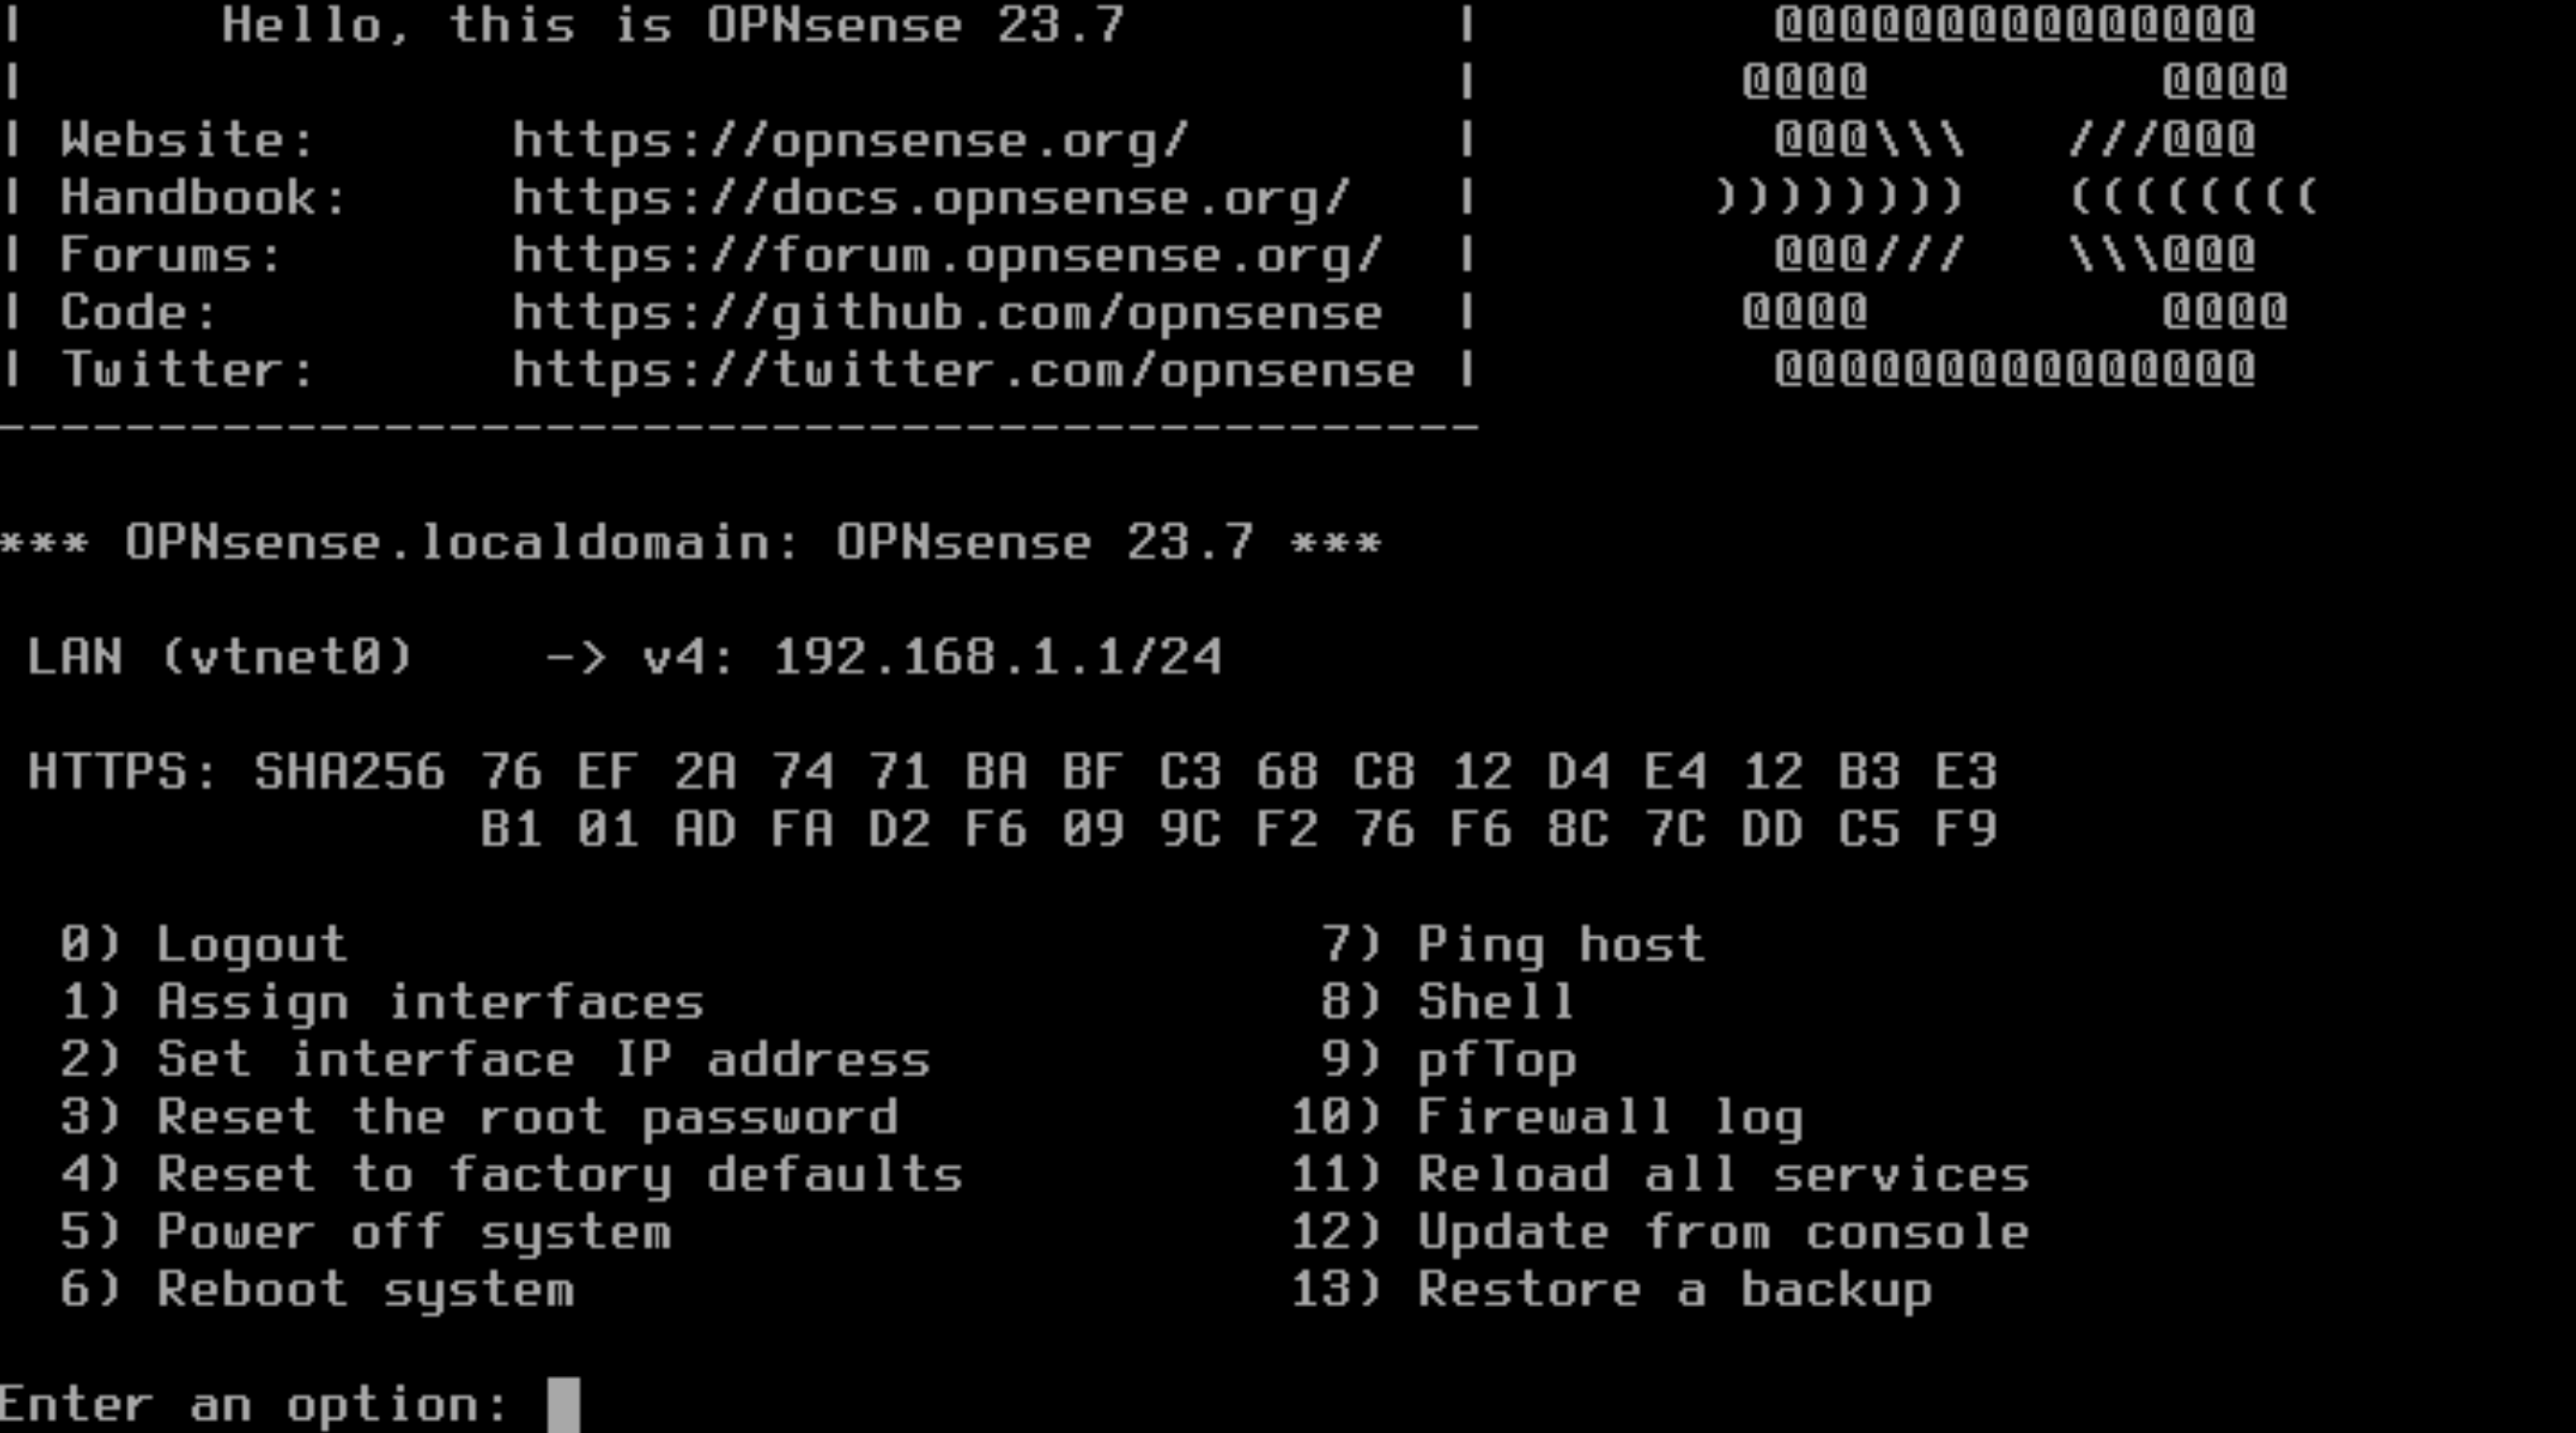
Take a moment to look at the available options presented before you. We will be using several of these in the next few steps
3. Before we continue configuring OPNsense, a new network device must be added to it. To do so, please navigate to the Hardware tab, located right below the Console tab in Proxmox. You should be presented with the following:
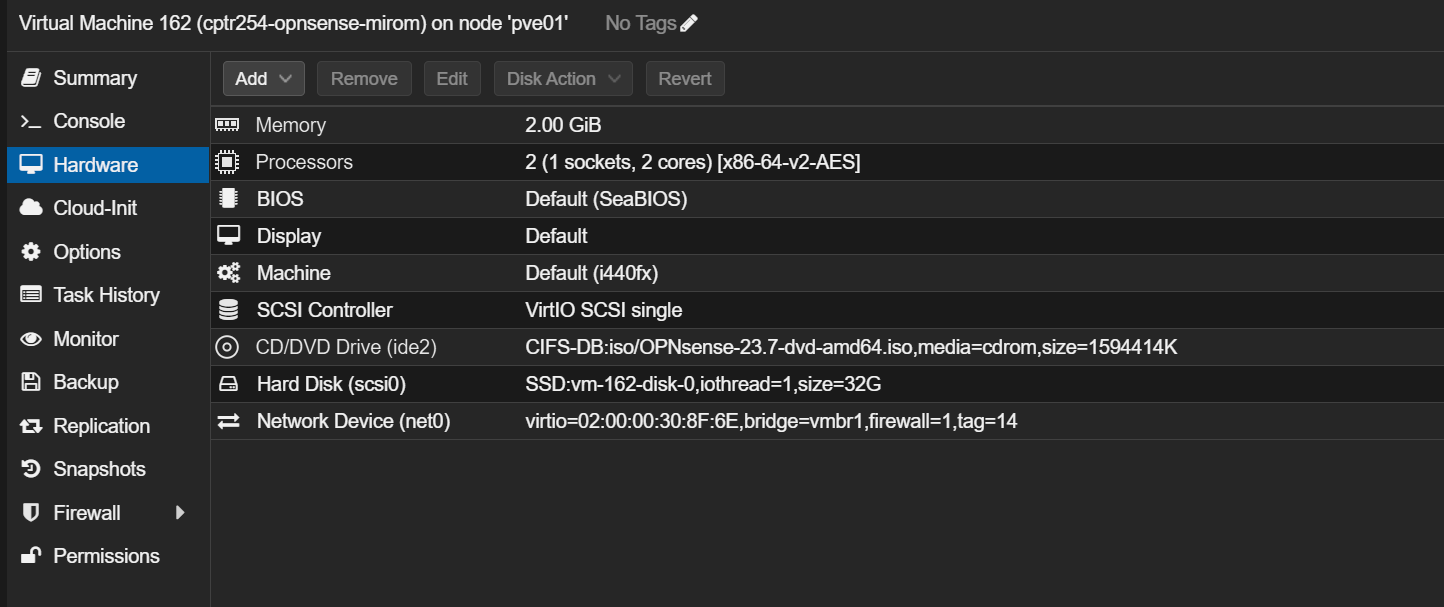
4. Click the Add button at the top, and select Network device from the dropdown
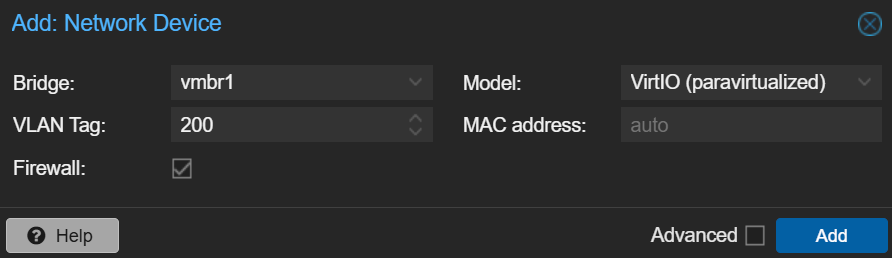
5. You will be presented with a small window where you can configure the network device
-
Set the Bridge field to vmbr1
-
Set the VLAN Tag field to to VLAN next to your name on the VLAN Assignments page
-
Click Add
6. Your current hardware should look like the following:
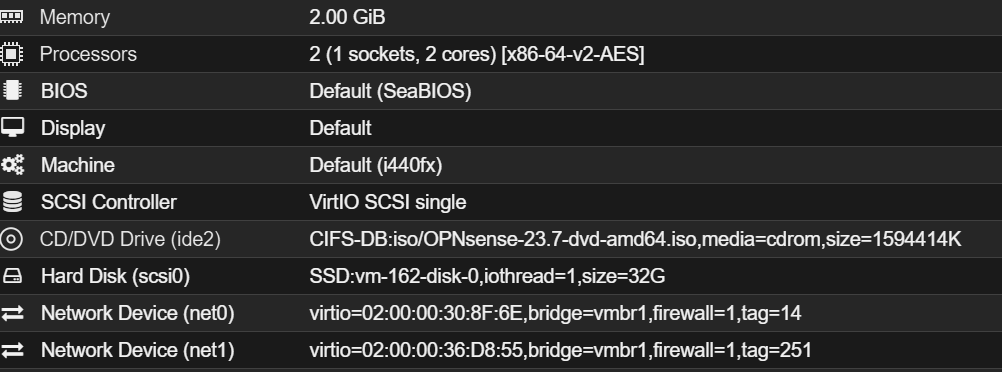
You should now have two network devices. The one with net0 in the name should have tag=14 at the end, while the end ending in net1 should have tag=<YOUR_VLAN_TAG_HERE>
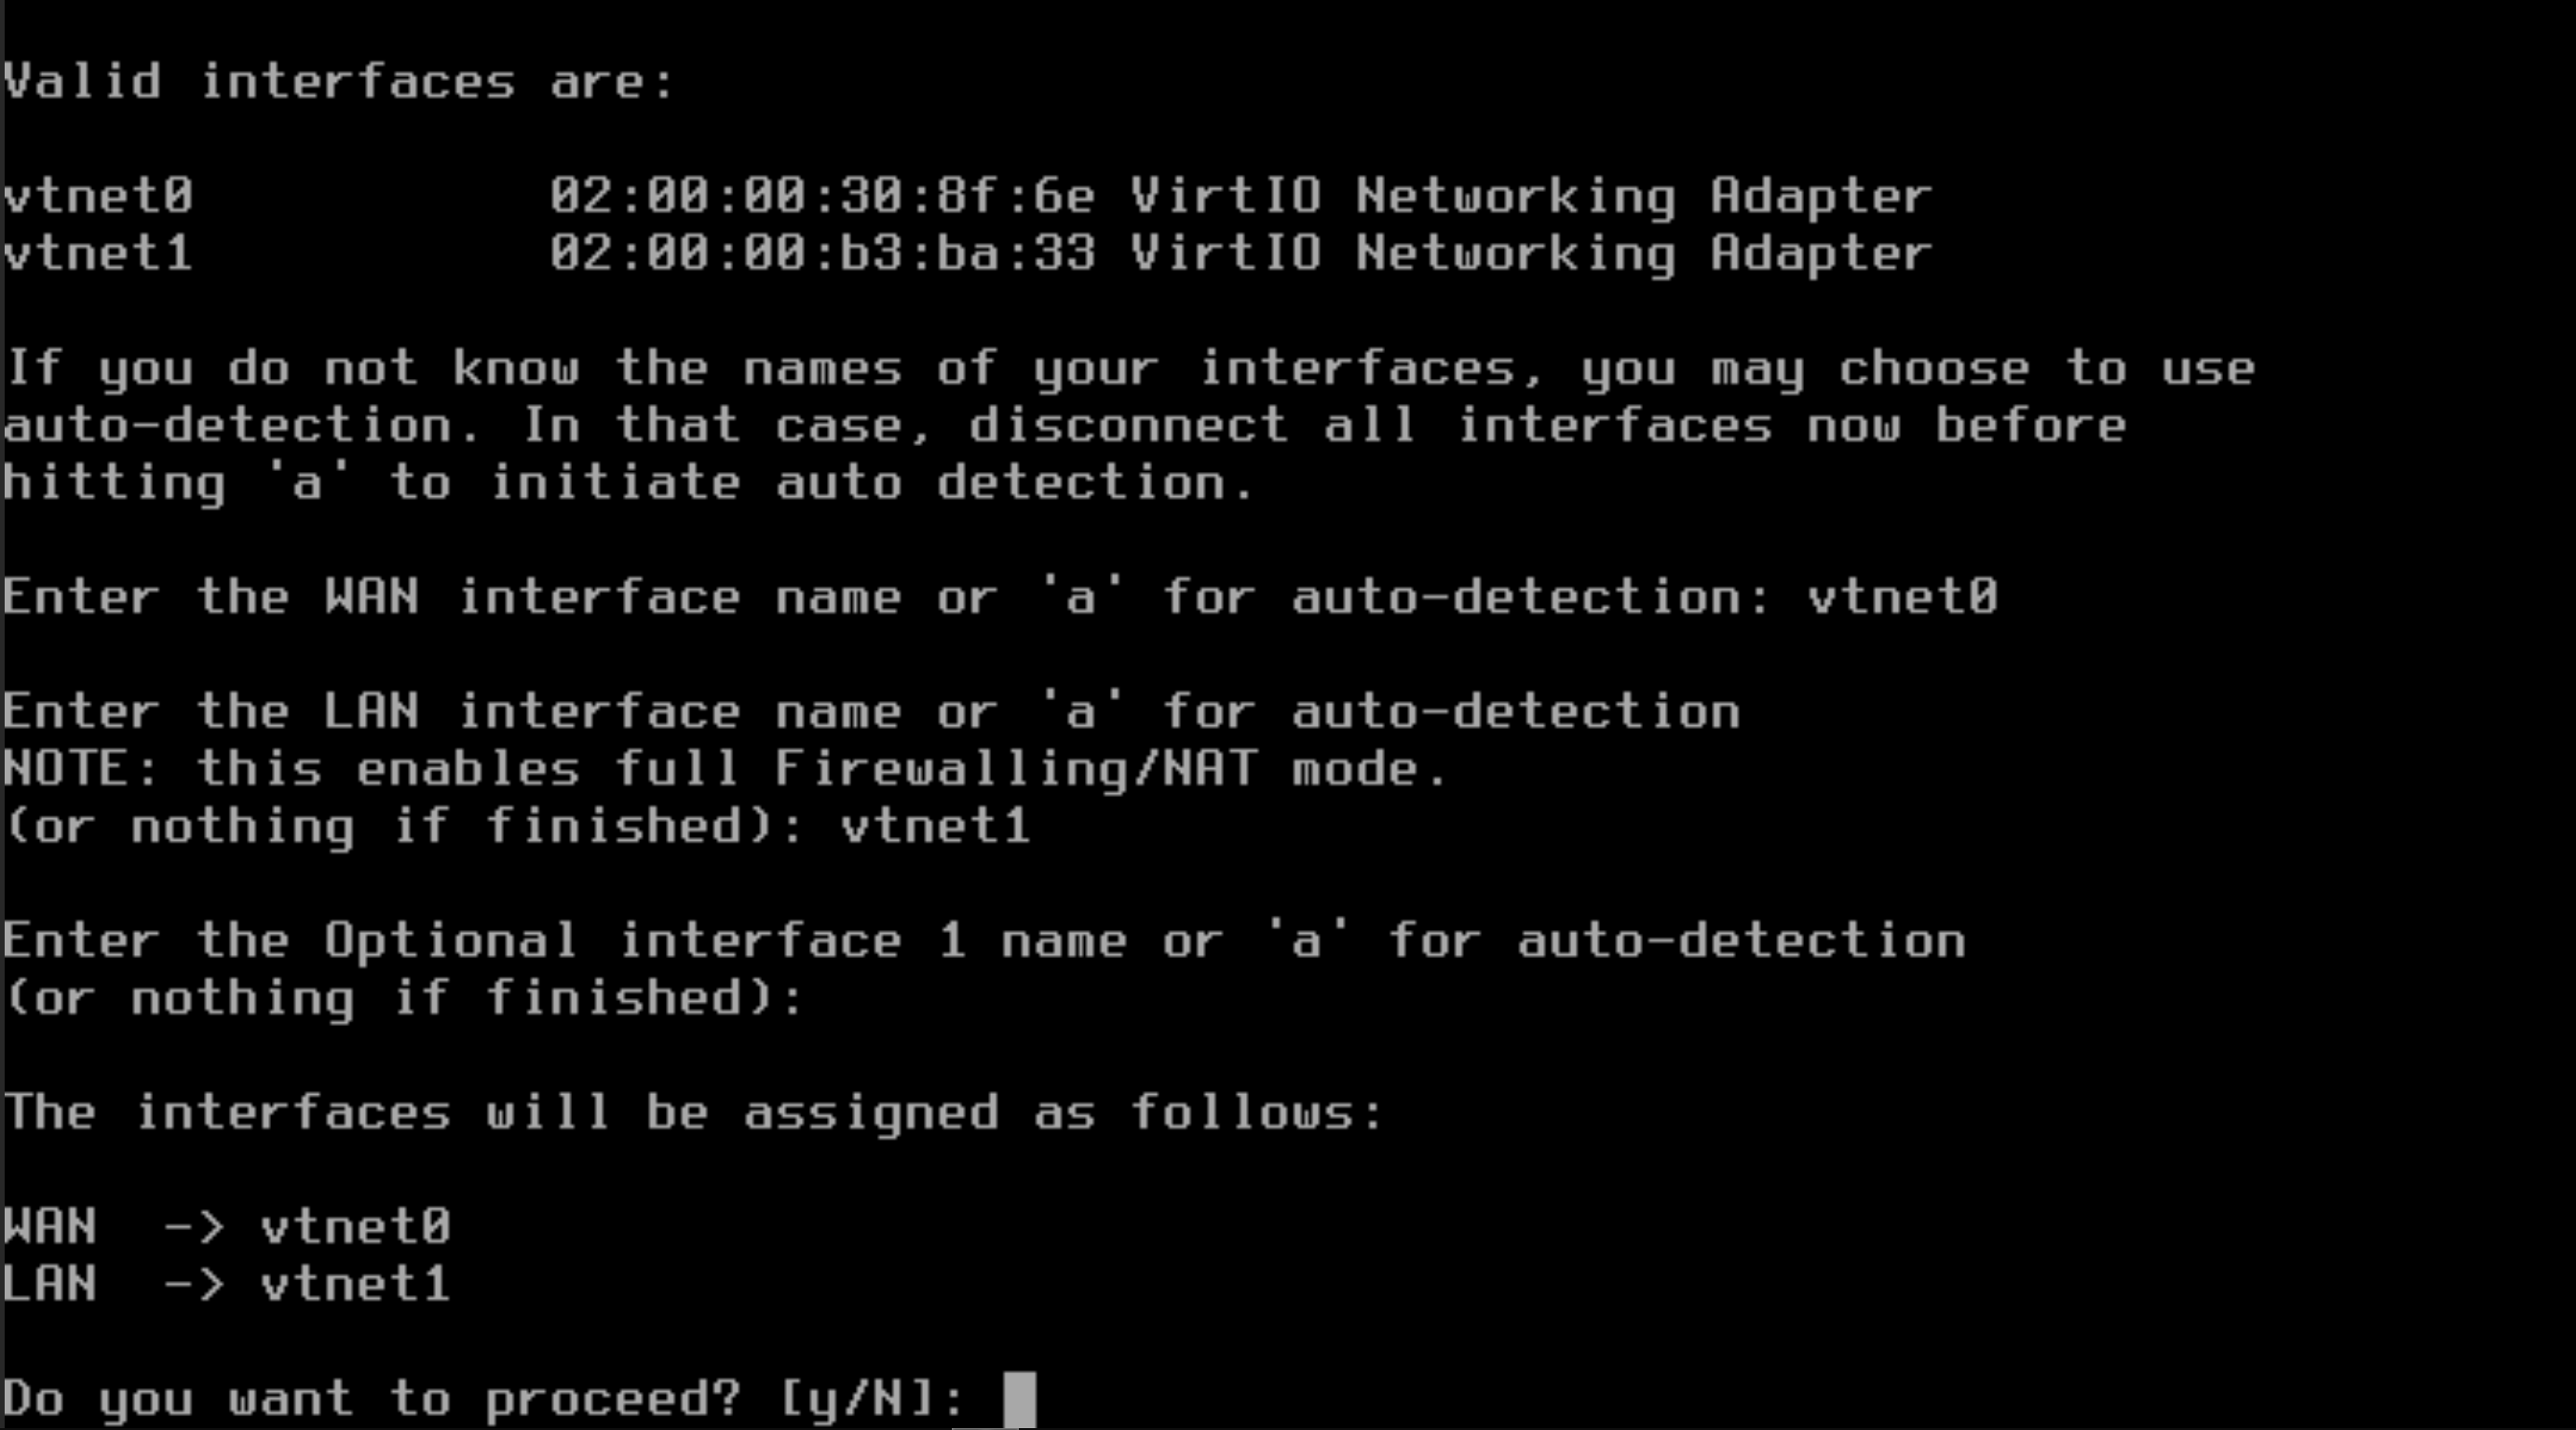
8. After pressing enter, you should once again be prompted to Enter an Option. Type 1 to assign interfaces and submit
9. Next, you will be asked whether you want to configure LAGGs, then VLANs; say no to both
10. When prompted to enter the WAN interface name, type vtnet0 and submit
11. Next, type vtnet1 when prompted for the LAN interface name
12. Finally, you should be prompted with something similar to the following screenshot. Proceed if it matches